


Installing and maintaining centerlock disc brakes on your bicycle is a pivotal skill that can enhance your riding experience by providing consistent stopping power and improved control under various conditions. Unlike traditional rim brakes, centerlock disc brakes offer superior performance, especially in wet and muddy conditions, making them a popular choice among both road cyclists and mountain bikers.
Understanding Centerlock Disc Brakes
Centerlock disc brakes use a special mounting system developed by Shimano to attach the brake rotor to the hub. The system allows for quicker rotor swaps and a more reliable connection by using a splined interface and a lockring to secure the rotor in place. This design simplifies installation and maintenance while offering an aesthetically pleasing look.
Tools and Materials Needed
Before beginning the installation process, make sure you have the following tools and materials:
Centerlock-compatible rotor
Torque wrench
Lockring tool (specific to centerlock systems)
Isopropyl alcohol
Clean rag
Installation Process
Prepare the Hub: Start by removing the wheel from your bike. If your hub already has a rotor installed, remove the old rotor by loosening the lockring with the lockring tool. Clean the hub surface to ensure it's free of dirt and grease.
Install the Rotor: Take your new centerlock rotor and align its splines with those on the hub. Gently slide the rotor into place, ensuring it sits flush against the hub.
Secure the Rotor: Place the lockring onto the hub and tighten it by hand to ensure the rotor is properly seated. Then, using the lockring tool and a torque wrench, tighten the lockring to the manufacturer's recommended torque specification. This step is crucial to prevent the rotor from coming loose during rides.
Reinstall the Wheel: Once the rotor is securely fastened, reinstall the wheel on your bike. Make sure the wheel is correctly seated in the dropouts and the quick-release or thru-axle is tightly secured.
Check the Brake Caliper Alignment: Before riding, check that the brake caliper is correctly aligned so that the pads are evenly spaced around the rotor. If necessary, adjust the caliper position to avoid rubbing.
Maintenance Tips
Regular maintenance of your centerlock disc brakes will ensure they continue to perform optimally. Here are some tips to keep your brakes in top condition:
Clean the Rotors Regularly: Use isopropyl alcohol and a clean rag to wipe down your rotors periodically, especially after riding in wet or muddy conditions. This prevents buildup of debris and ensures consistent braking performance.
Inspect Brake Pads for Wear: Disc brake pads wear down over time and need to be replaced when they become too thin. Check pad thickness regularly and replace the pads if they are worn down to the manufacturer's recommended limit.
Bleed Hydraulic Brakes: If your disc brakes are hydraulic, they may require bleeding to remove air bubbles from the brake lines. This process varies by brake model, so consult your brake's documentation for specific instructions.
Listen for Noises: Squealing or grinding noises during braking can indicate dirty or misaligned rotors, contaminated brake pads, or other issues. Address any unusual sounds promptly to maintain brake performance and safety.
Tighten the Lockring Periodically: Check the tightness of the rotor lockring periodically, especially if you frequently swap rotors. Use a torque wrench to ensure it's tightened to the correct specification.

By following these installation and maintenance steps, you can enjoy the benefits of centerlock disc brakes and ensure your bicycle is safe and responsive, no matter where your rides take you. Whether you're a seasoned pro or new to the world of cycling, mastering the art of working with centerlock disc brakes is a valuable skill that will enhance your overall cycling experience.
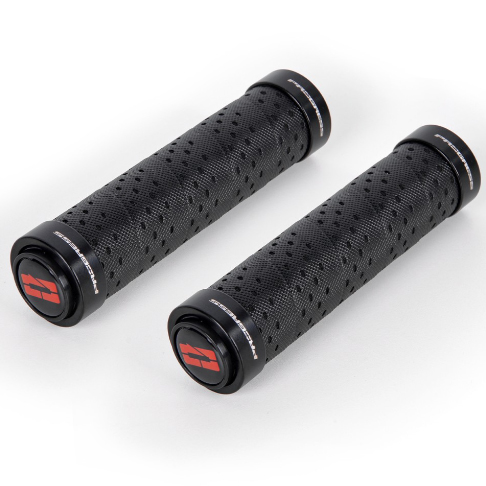
Achieving the perfect balance of comfort and control on your bike largely depends on one critical touchpoint: the handlebar grips. Whether you're navigating rugged trails, cruising city streets, or competing in a race, the right grips can significantly enhance your riding experience.
Understand Grip Types: Handlebar grips come in various shapes, materials, and textures. Ergonomic grips are designed to conform to the shape of your hand, reducing pressure points and fatigue during long rides. Lock-on grips feature a clamp system that prevents them from twisting or slipping, offering reliable control in all conditions. Foam grips, meanwhile, are known for their light weight and exceptional vibration damping properties.
Select the Right Material: Rubber grips are popular for their durability and range of textures, offering a secure grip in wet or dry conditions. Silicone grips are softer and absorb vibrations well but might wear out faster than rubber. For those seeking the ultimate in comfort and shock absorption, foam grips are an excellent choice, though they may not provide as much direct feedback as rubber or silicone.
Consider Bar Ends: For riders looking for additional hand positions and leverage, especially on climbs, grips with integrated or add-on bar ends can offer a significant advantage. They allow you to change your grip position, reducing strain on your hands, wrists, and shoulders during long rides.
Grip Texture and Thickness: The texture of your grips should match your usual riding conditions. Smoother grips may suffice for calm, road biking, while a more aggressive texture provides extra hold for off-road adventures. The thickness of the grips also plays into comfort, with thicker grips offering more cushioning but potentially feeling bulkier for riders with smaller hands. It's a personal preference, so consider testing a few options to find what works best for you.
Installation Tips: When installing new grips, cleanliness is key. Ensure both the handlebar and inside of the grips are clean and dry. For slip-on grips, a bit of hairspray or alcohol inside the grip can help it slide on easier and then stick in place once dry. For lock-on grips, simply slide them onto the bar and tighten the clamp bolts evenly for a secure fit.
Maintenance: Regularly check your grips for wear and tear, especially if you ride frequently or in harsh conditions. Worn-out grips can reduce your control over the bike and lead to discomfort or blisters.

In Conclusion, upgrading to the best handlebar grips for your needs is a simple yet effective way to improve both comfort and control on your bike.
By understanding the types of grips available, choosing the right material and features for your riding style, and ensuring a proper installation, you can enjoy a more comfortable, controlled, and enjoyable ride every time.

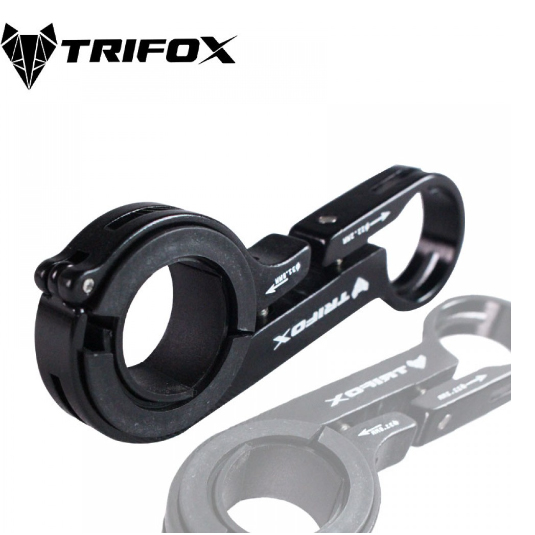
For avid cyclists and casual riders alike, comfort and functionality on long rides are paramount. A bicycle handlebar extender can significantly enhance your riding experience by providing extra space for mounting gadgets, improving control, and offering a more comfortable riding position. Here's how to make the most of this simple yet effective accessory.
Why Use a Handlebar Extender?
Handlebar extenders are perfect for when you need more room for lights, GPS devices, smartphones, or even a horn. They allow you to keep all your essential gear within easy reach, without cluttering your main handlebar space. Additionally, for those seeking a more upright riding posture, extenders can help alleviate back and neck strain by adjusting the height or angle of your handlebars.
Choosing the Right Extender
When selecting a handlebar extender, consider the material, length, and diameter. Aluminum extenders offer a great balance between strength and weight, while carbon fiber options provide the ultimate in lightweight durability. Ensure the extender is compatible with your bike's handlebar diameter and offers enough length to accommodate all your accessories.
Installation Tips
Installing a handlebar extender is a straightforward process that requires minimal tools:
Positioning: Decide where you want to place the extender on your handlebars. It should be easily accessible but not interfere with your riding.
Attachment: Loosen the screws on the clamp of the extender, wrap it around the handlebar, and then tighten the screws. Make sure it's secure but avoid over-tightening, which can damage the handlebar.
Mounting Accessories: Once the extender is in place, start mounting your accessories. Distribute the weight evenly to maintain balance and ensure the bike handles well.
Maximizing Comfort and Efficiency
With everything installed, take a test ride to adjust the positions of the mounted items for optimal comfort and accessibility. You might find that slight adjustments can make a significant difference in your overall riding experience.
Safety Considerations
Always ensure that your handlebar extender and mounted accessories do not obstruct your view or interfere with operating the bike. Regularly check that the extender is securely fastened and that there's no movement while riding.
In Conclusion
A bicycle handlebar extender is a simple upgrade that can vastly improve your cycling experience. By freeing up handlebar space, enhancing control, and allowing for a more comfortable riding position, it's an accessory worth considering for any cyclist looking to make their journeys more enjoyable and efficient.
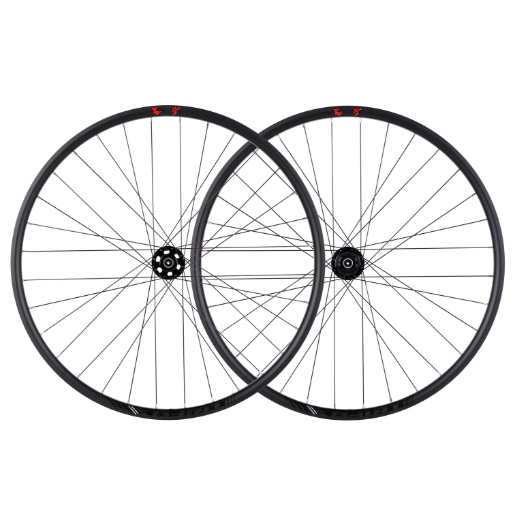
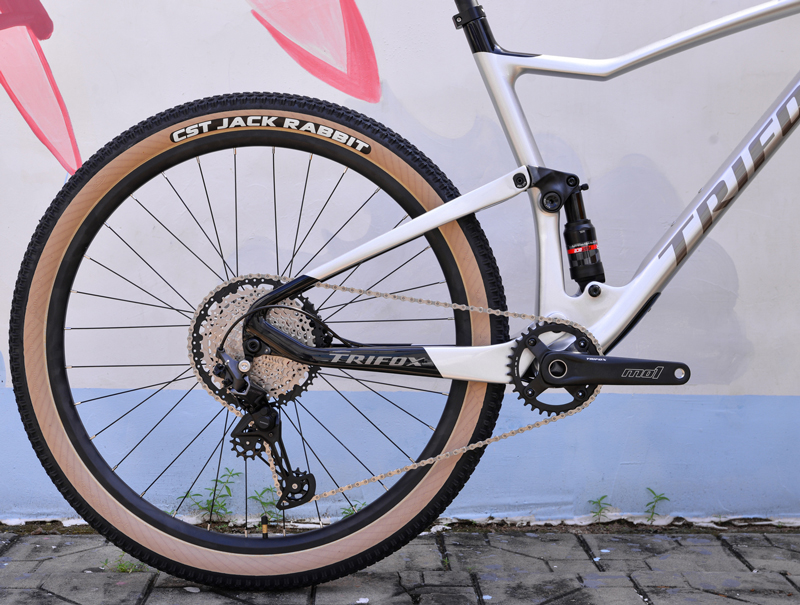
Choosing the right MTB rims can significantly enhance your mountain biking adventures. The key is to find rims that match your riding style, terrain, and durability needs.
Riding Style & Terrain: Consider where and how you ride. Cross-country enthusiasts should look for lightweight rims to help save energy over long distances. Those into downhill or enduro riding might opt for wider and more durable rims, capable of handling rough terrains and high impacts.
Material Matters: Aluminum rims are popular due to their blend of weight, strength, and cost-effectiveness. Carbon fiber rims, while pricier, offer superior stiffness, reducing energy loss during pedaling, and can withstand more abuse on tricky trails.
Rim Width: Rim width plays a pivotal role in tire performance. Wider rims provide a better tire profile, increasing traction and stability by allowing you to run lower tire pressures. Typically, a rim width of 30-35mm hits the sweet spot for most mountain bike tires.
Tubeless Compatibility: Tubeless rims are highly recommended. They allow you to ride with lower tire pressures without the risk of pinch flats, enhance grip, and improve ride comfort. Plus, they're lighter than traditional tube setups.
Brake Compatibility: Make sure the rims are compatible with your bike's brake system. Disc brakes are the norm in mountain biking, but the rotor attachment (center-lock or 6-bolt) can vary.

In conclusion, the best MTB rim is one that aligns with your riding style, is made from materials that suit your durability and weight preferences, and fits well with your tire choice and brake system. Remember, the right rims can transform your ride, making every adventure more thrilling and enjoyable.

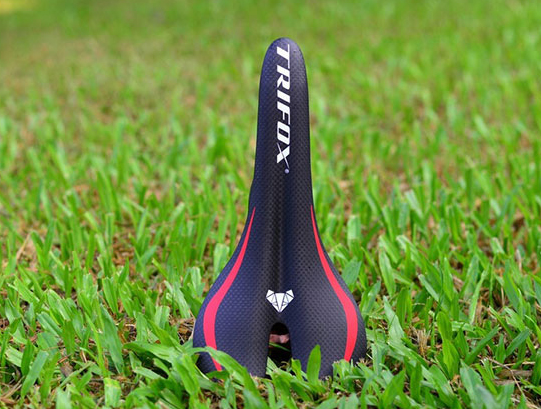
Riding comfort is a crucial aspect of cycling, whether you're a daily commuter, a weekend warrior, or a competitive cyclist. The right bicycle seat cushion can significantly enhance your riding experience, allowing you to cover longer distances more comfortably and enjoyably. One standout option for those seeking to upgrade their ride is the Carbon Bike Saddle CS100, which promises enhanced riding comfort among other benefits.
The Importance of Riding Comfort
Comfort on the bike is about more than just enjoying your rides. It's also about preventing injuries, reducing fatigue, and improving performance. A seat cushion that doesn't suit your body can lead to discomfort, pain, and even long-term health issues. Therefore, selecting the right bicycle seat cushion is a decision that should not be taken lightly.
Introducing the Carbon Bike Saddle CS100
The Carbon Bike Saddle CS100 offers a combination of high-quality materials, design excellence, and comfort-enhancing features. It's designed to cater to the needs of diverse riders, providing a comfortable platform that supports longer and more enjoyable rides.
Enhanced Riding Comfort
At the heart of the CS100's appeal is its promise of enhanced riding comfort. This is achieved through a meticulously designed ergonomic shape that supports the sit bones while minimizing pressure on soft tissues. The use of carbon in the saddle's construction also plays a crucial role. Carbon is known for its ability to dampen vibrations, offering a smoother ride over rough surfaces.
Top Quality Items for Less
Investing in a high-quality saddle like the CS100 doesn't have to break the bank. It represents excellent value for money, ensuring that riders can access top-notch comfort and performance features without a hefty price tag. This accessibility means that more cyclists can experience the benefits of a premium seat cushion, enhancing the overall quality of their rides.
24/7 Live Chat Support
Selecting the right saddle can be daunting, but the availability of 24/7 live chat support with the CS100 ensures that riders can make informed decisions. Whether you have questions about compatibility, installation, or simply want advice on the best option for your riding style, expert assistance is always at hand.
Fast & Reliable Delivery Options
Once you've decided on the CS100, fast and reliable delivery options mean you won't have to wait long to enjoy your upgraded ride. This convenience minimizes downtime and gets you back on the road or trail with minimal delay.
Multiple Safe Payment Methods
With various safe payment methods available, purchasing the CS100 is straightforward and secure. This range of options ensures that the buying process is hassle-free, letting you focus on the excitement of enhancing your riding experience.
Selecting the Right Seat Cushion
While the Carbon Bike Saddle CS100 offers numerous benefits, ensuring it's the right fit for you is essential. Here are some factors to consider when choosing any bicycle seat cushion:
Body Geometry: Consider your sit bone width and the type of riding you do. A properly sized saddle will support your sit bones without causing pressure on soft tissues.
Material: Materials like carbon fiber offer a good balance of stiffness (for efficient power transfer) and vibration damping (for comfort).Shape and Cutouts: Some riders prefer saddles with a central cutout to reduce pressure and enhance breathability. Others may find a solid saddle more comfortable. It's about personal preference and finding what works best for you.
Compatibility: Ensure the saddle fits your bike's seat post and aligns with your desired riding position. Some saddles are designed with a particular posture in mind, from upright to aggressive racing stances.
Conclusion
Enhancing your riding comfort with the right bicycle seat cushion is a game-changer for any cyclist. The Carbon Bike Saddle CS100 stands out as an excellent choice, offering a blend of quality, comfort, and value that can elevate your cycling experience. By considering your unique needs and the features that contribute to saddle comfort, you can make an informed choice that ensures every ride is a pleasure. Remember, the right saddle is out there for everyone; it's just a matter of finding it.

Mountain biking is an exhilarating sport that offers the freedom to explore nature, tackle challenging terrains, and push your limits. An essential component that significantly affects your mountain bike's performance is the freehub. It's responsible for driving your bike forward without pedaling and plays a crucial role in shifting gears. Ensuring your MTB freehub is compatible with your bike not only enhances your riding experience but also prevents mechanical failures. Here’s how you can check and match MTB freehub compatibility for your mountain bike.
Understanding Freehubs
Before diving into compatibility, it's crucial to understand what a freehub is. A freehub is part of the rear hub on your bike, housing the mechanism that allows the wheel to spin freely when you're not pedaling. It also includes the splines where the cassette (the set of gears) mounts.
Identifying Your Freehub Type
The first step in checking compatibility is identifying your freehub type. There are several types of freehubs, but the most common in mountain biking are Shimano, SRAM XD, and Micro Spline.
Shimano: Known for its reliability, the Shimano freehub design has been a standard in the cycling world. It accommodates cassettes with up to 11-speeds on most models.
SRAM XD: Designed for the SRAM XX1 groupset, the XD driver is lighter and allows for a more extensive range of gears, accommodating a 10-tooth smallest cog.
Micro Spline: Introduced by Shimano for their 12-speed systems, Micro Spline enables the use of a 10-tooth smallest cog and features a new interface for better engagement and durability.
To identify your freehub type, remove your rear wheel and cassette to expose the freehub. The shape of the splines and the mounting system can help you determine the type.
Checking Compatibility
Once you've identified your freehub type, the next step is to check its compatibility with your mountain bike. Here are key factors to consider:
Cassette Compatibility: Ensure that your cassette matches the freehub type. For example, a Shimano cassette won't fit on an SRAM XD freehub without an adapter.
Speed Compatibility: The number of speeds on your cassette should match the freehub's capability. Mixing different speeds (e.g., using an 11-speed cassette on a freehub designed for 9-speed) might work temporarily but can lead to poor shifting performance and increased wear.
Hub and Frame Compatibility: The overall hub width must match your bike frame's specifications. Mountain bikes commonly use hubs that are 135mm, 142mm, or 148mm (Boost) wide. Ensure your freehub and hub assembly align with your frame's requirements.
Matching Components
After ensuring compatibility, matching your components is straightforward. When purchasing a new freehub or cassette, pay close attention to the specifications:
For Shimano and Micro Spline: Look for the specific model that matches your drivetrain's speed and ensure it fits the hub's width.For SRAM XD: Verify that the freehub is labeled as XD-compatible and matches the speed and hub width of your setup.
It's also worth considering the material and build quality of the freehub, as these can affect weight, durability, and performance.
Professional Help
If you're unsure about compatibility or how to proceed with swapping components, seeking professional help from a bike mechanic is advisable. They can provide valuable insights, recommend compatible parts, and even handle the installation for you.
Conclusion
Matching your MTB freehub with your mountain bike is crucial for optimal performance and durability. By understanding the different types of freehubs, checking compatibility with your bike's specifications, and carefully selecting matching components, you can ensure a seamless and enjoyable riding experience.
Remember, when in doubt, consult a professional to avoid costly mistakes and ensure your mountain bike is in top condition for your next adventure.

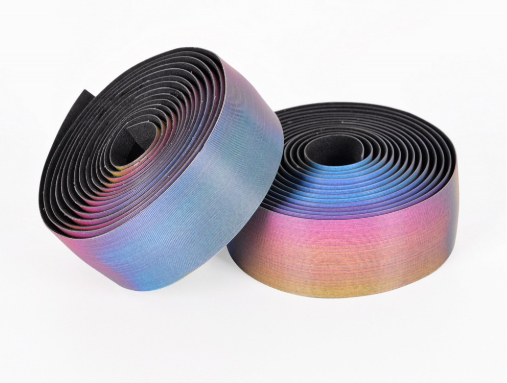
Whether you're an avid time trialist, a triathlete, or simply a cycling enthusiast looking to optimize your road bike's aerodynamics, aero bars are an essential component of your setup. However, the benefits of aero bars in terms of speed and aerodynamics can be offset by discomfort and poor grip if not properly outfitted with the right bar tape. Selecting and wrapping bar tape for aero bars is thus crucial for enhancing both comfort and grip during rides.
Selecting the Right Bar Tape
Material Matters: The first step in selecting bar tape for aero bars is considering the material. Options typically include synthetic materials, cork, and silicone. Synthetics offer durability and a wide range of colors and patterns, while cork provides natural vibration damping qualities for increased comfort. Silicone tape is relatively new but is gaining popularity for its tackiness and ability to be re-wrapped without leaving residue.
Thickness and Cushioning: Aero bar setups benefit from tape that provides adequate cushioning without adding unnecessary bulk. Thicker tapes offer better vibration absorption, which can be crucial for long-distance rides, whereas thinner tapes give a more direct feel of the bars. Consider your personal preference and the type of riding you do most often when choosing the thickness.
Texture and Grip: Look for tape with a texture that ensures a secure grip even when wet. This is particularly important for aero bars, where maintaining control in an aerodynamic position is key. Tapes with a tacky surface or textured pattern can offer improved grip compared to smoother options.
Wrapping Your Aero Bars
Preparation: Begin by cleaning your aero bars thoroughly to remove any dirt, grease, or old adhesive. Ensure the surface is dry before starting to wrap.
Starting Point: Decide whether you want to start wrapping from the ends of the aero bars moving towards the center or vice versa. Starting from the ends can help secure the tape more effectively, especially if the tape comes with adhesive backing.
Wrapping Technique: When wrapping, pull the tape tightly enough to prevent wrinkles or bubbles but not so tight as to stretch or tear the tape. Overlap each wrap by about one-third of the tape's width for even coverage. For aero bars, you may need to cut the tape into shorter lengths or strips to navigate complex shapes or tight bends effectively.
Finishing Touches: Once you reach the end of your wrap, cut the tape at an angle to create a neat finish. Use electrical tape or the finishing tape provided with your bar tape to secure the end. Some cyclists also use a small amount of super glue or similar adhesive under the final wrap for extra security.
Bar End Plugs: Insert bar end plugs to secure the tape at the ends of the bars. For aero bars, you might not use traditional bar end plugs, but ensuring the tape's end is securely fastened is still important.
Conclusion
Wrapping bar tape around aero bars might seem like a minor detail, but it's a critical aspect of bike setup that can significantly impact your comfort and performance. By selecting the right tape and applying it with care, you can enhance your grip, control, and overall riding experience. Remember, practice makes perfect, so don't be discouraged if your first attempt isn't flawless. With time and patience, you'll be able to achieve a professional-looking wrap that complements your aero setup perfectly.

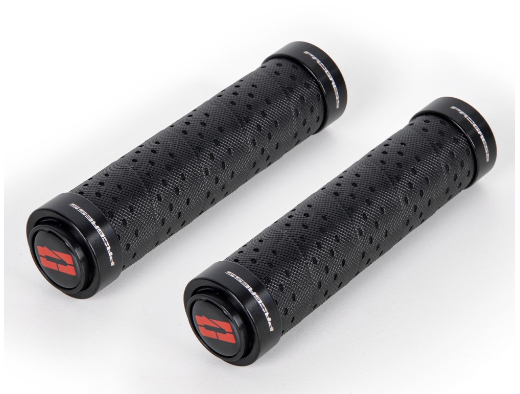
Mountain biking, particularly the enduro discipline, demands not only skill and endurance but also the right equipment to tackle demanding trails. Among the most crucial components are the grips, which serve as your primary contact point with the bike. They significantly influence your control, comfort, and overall riding experience. With countless options on the market, choosing the best enduro mountain bike grips can seem daunting
Understanding Enduro Mountain Biking
Enduro mountain biking is characterized by diverse terrains, including steep descents, technical sections, and challenging climbs. It requires equipment that offers a blend of performance, durability, and comfort. Grips, in particular, need to provide excellent control and vibration damping to handle rough trails while minimizing hand fatigue.
Key Features to Consider
When searching for the best enduro mountain bike grips, several features stand out as particularly important:
Grip Material: Most enduro grips are made from rubber compounds that offer a balance between softness for comfort and firmness for durability. Some may include dual or triple compounds for optimized performance.
Texture and Pattern: The texture should provide sufficient grip without being abrasive to your hands. Look for patterns that enhance grip in wet conditions and reduce slippage.
Diameter and Length: The grips should fit your hands comfortably. Riders with larger hands may prefer thicker grips for better control, while those with smaller hands might find thinner grips more comfortable. The length should accommodate your hand size and riding style.
Shock Absorption: Vibration damping is crucial in enduro riding to reduce fatigue and increase control. Look for grips with features like gel inserts or specific rubber compounds designed to absorb shock.
Lock-On Mechanism: Lock-on grips feature a clamp that secures them to the handlebar, preventing twisting or slipping during aggressive riding. While slightly heavier, they are highly recommended for enduro riding for their reliability.
Top Picks for Trifox Mountain Bike Grips
While I can't reference specific products, several brands and models have earned reputations for excellence in the enduro scene. Brands like Trifox produce grips that are frequently praised for their quality, comfort, and performance.
Installation Tips
Proper installation is key to getting the most out of your grips. For lock-on grips, ensure the clamps are evenly tightened to the manufacturer's specified torque. For slip-on grips, a bit of hair spray or rubbing alcohol can help slide them onto the bar and then keep them in place once dry.
Personal Preference and Trial
Ultimately, the best enduro mountain bike grips for you come down to personal preference. Factors like hand size, sweat production, and specific riding conditions play significant roles in what makes a grip ideal. Don't hesitate to try different models to find what works best for you. Many riders find that what feels good in the shop may feel different on the trail, so testing them in real conditions is invaluable.
Conclusion
Finding the best enduro mountain bike grips is about balancing factors like material, comfort, grip, and vibration damping to suit your specific needs. Considering the demands of enduro riding, investing time in selecting the right grips can significantly enhance your control and enjoyment on the trails. Remember, the best grip is one that you don't notice because it seamlessly supports your riding, allowing you to focus on the trail ahead.
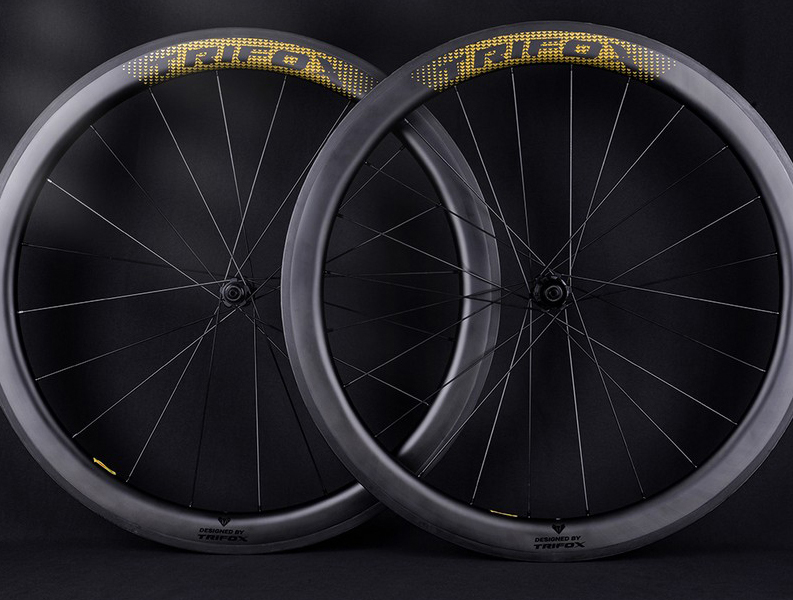
When it comes to upgrading your bike, choosing the right wheels can make a significant difference in your riding experience. Two popular materials dominate the market: aluminum and carbon. Both have their unique advantages, catering to different types of cyclists and needs.
Understanding Aluminum Wheels
Aluminum wheels have long been the go-to choice for many cyclists, from beginners to seasoned enthusiasts. They are known for their durability, affordability, and versatility. Aluminum alloy, used in wheel construction, offers a good balance of strength and weight, making these wheels suitable for a wide range of riding conditions.
Advantages of Aluminum Wheels:
- Durability: Aluminum wheels can withstand a considerable amount of abuse, making them ideal for rough roads and varied terrains.
- Cost-Effectiveness: Generally more affordable than their carbon counterparts, aluminum wheels are an excellent option for those on a budget.
- Braking Performance: With advancements in brake track surface technology, aluminum wheels provide consistent braking in various conditions.
Exploring Carbon Wheels
Carbon wheels have surged in popularity, particularly among performance-focused cyclists and racers. Made from carbon fiber, these wheels are designed to offer superior stiffness, aerodynamics, and a noticeable reduction in weight compared to aluminum wheels.
Advantages of Carbon Wheels:
- Weight Savings: Carbon wheels are significantly lighter, which can improve climbing efficiency and acceleration.
- Aerodynamics: The ability to mold carbon fiber into aerodynamic shapes helps reduce drag, offering speed advantages, especially at higher velocities.
- Ride Quality: Carbon can be engineered to absorb road vibrations, providing a smoother ride over harsh surfaces.
Deciding Between Aluminum and Carbon Wheels
The choice between aluminum and carbon wheels depends on several factors including your budget, riding style, and performance goals. Here's how to decide:
1. Consider Your Budget: If cost is a primary concern, aluminum wheels offer great value and performance at a more accessible price point. However, if you're willing to invest in potential performance gains, carbon wheels could be worth the extra expenditure.
2. Assess Your Riding Style: For aggressive riders or those frequently tackling rough terrains, the durability of aluminum might be preferable. Conversely, if you prioritize speed, efficiency, and enjoy riding on well-maintained roads or racing, the lightweight and aerodynamic benefits of carbon wheels might align better with your needs.
3. Evaluate Performance Goals: Cyclists aiming to shave off seconds in races or seeking every possible advantage in climbing and acceleration might find carbon wheels more appealing. Meanwhile, recreational riders or those less concerned with competitive performance may find aluminum wheels perfectly adequate.
4. Maintenance and Longevity Considerations: Carbon wheels, while strong, can be more susceptible to impact damage and usually require more careful handling and maintenance. Aluminum wheels are often seen as more robust for everyday use and mixed conditions.
5. Braking Performance: Traditionally, aluminum wheels have offered more reliable braking, especially in wet conditions. However, advancements in carbon wheel manufacturing have significantly improved carbon braking performance, though differences can still exist.
6. Aesthetic and Feel: Some cyclists prefer the look and feel of carbon wheels on their bike. The aesthetics and perceived prestige, along with the distinctive sound of carbon wheels, can also influence the decision.

Conclusion
Deciding between aluminum and carbon wheels ultimately comes down to personal preferences, priorities, and what you hope to achieve with your cycling experience. Both options have their merits, and advancements in technology continue to blur the lines between them.
Whether you opt for the reliability and value of aluminum or the performance edge and sophistication of carbon, ensure that your choice complements your cycling style and goals. Remember, the best wheel is the one that meets your needs and brings you the most enjoyment on the road.


